if you are fine-tuning your own LLMs, you need a way to evaluate them. And while there are over a dozen popular methods to choose from,
- each of them are biased toward a specific, narrowly scoped measure.
- none of them can identify potential internal problems in your model, and
- in the end, you will probably need to design a custom metric for your LLM
Can you do better? Before you design a custom metric, there is a better, cheaper, and faster approach to help you get started–using the open -source weightwatcher tool
WeightWatcher is a one-of-a-kind must-have tool for anyone training, deploying, or monitoring Deep Neural Networks (DNNs).
How does it work ? The weightwatcher tool assigns a quality metric (called alpha) to every layer in the model. The best models have layer alpha in the range alpha>2 and alpha<6. And the average layer alpha (<alpha>) is a general-purpose quality metric for your fine-tuned LLMs; when comparing models, smaller <alpha> is better.
How does this work ? Let’s walk through an example. We consider the Falcon-7b-Instruct instruction fine-tuned model. But first,
0.) WeightWatcher Requirements for Fine-Tuned Models
For this blog, we consider models where the fine-tuning updates has been merged with the base model. In a future blog, we will show how to examine the updates (i.e the adapter_model.bin) files directly. For this
- The base_model should be stored in the HF safetensors format
- The merged model does not need to be safetensors format, but the base model must have exactly the same layer names
- The update should be for either fully fined models, or PEFT/LoRa models with a fairly large LoRa rank r>=32, preferably r>=64 or r>=128
On compute resources, weightwatcher can run on a generaic GPU, CPU, or multi-core CPU, and will automatically will detect the ennviroment and asjut to it.
Here’s a Google Colab Notebook with the code discussed below
1.) Install weight watcher
pip install weightwatcher
Just to be safe, you can print the weightwatcher version
print(ww.__version__)
The version should be 0.7.4 or higher
2.) Download the models. Here, we will use the pre-trained Falcon-7b-instruct model and the Falcon-7b base_model. To save memory, we will use the versions stored in the safetensors format.
2.a) For Falcon-7b-instruct, you can just check out the git repo directly
git clone https://huggingface.co/tiiuae/falcon-7b-instruct
To save space, you may delete the large pytorch_model.bin files
2.b) For the base model, Falcon-7b, we need to do a little extra work to download them (because the Falcon-7b safetensors branch is not available from git directly. First, git check out the main repo:
git clone https://huggingface.co/tiiuae/falcon-7b
To save space, you may also delete these large pytorch_model.bin files here
2.c) Manually download the individual model.*.safetensors files, and place them directly in your local falcon-7b directory.
wget https://huggingface.co/tiiuae/falcon-7b/resolve/d09af65857360b23079dc3dc721a2ed29f4423e0/model-00001-of-00002.safetensors
wget https://huggingface.co/tiiuae/falcon-7b/resolve/d09af65857360b23079dc3dc721a2ed29f4423e0/model-00002-of-00002.safetensors
You will also want to download the model.safetensors.index.json file and place this in your local falcon-7b directory.
Your local directory should now look like:

3.) run weightwatcher
3.a) Just to confirm everything is working correctly, let’s run watcher.describe() first
import weightwatcher as ww
watcher = ww.WeightWatcher()
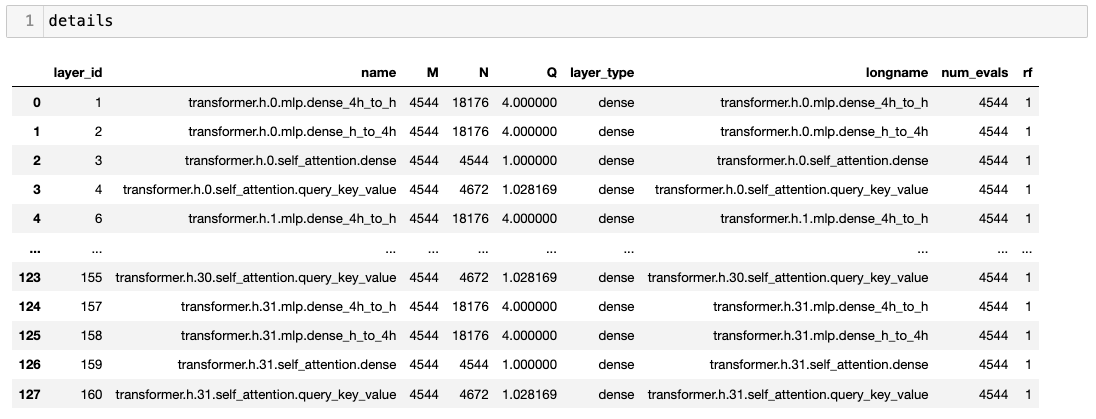
details = watcher.describe(base_model='falcon-7b', model='falcon-7b-instruct')
This will generate a pandas dataframe with a list of layer attributes. It should look like this:
3.b) If the details dataframe look good, you can run watcher.analyze()
import weightwatcher as ww
watcher = ww.WeightWatcher()
details = watcher.analyze(base_model='falcon-7b', model='falcon-7b-instruct')
The weightwatcher tool will compute the weight matrix updates (W-W_base) for every layer by subtracting out the base_model weights (W_base) from the weights (W) of the fine-tuned model. This lets us evaluate how well the fine-tuning worked.
3.c) Plotting a histogram of the layer alphas, we can see that almost every alpha lies in the weightwatcher safe-range of alpha in [2,4]. indicating this is a pretty good fine tuning.
Notice also the average layer alpha, <alpha>=2.814, which is pretty good.

And that’s all there is too it. You now have an evaluation metric <alpha>~2.8 for your fine-tined model (here, Falcon-7b-instruct). And you did not need to run any costly inference calculations, or even access to the training data.
You don’t even need a GPU–weightwatcher can run on a single CPU or a shared memory, multi-core CPU machine. You can run weightwatcher on Google Colab, or even locally on your MacBook (which I did).
4.) Comparing Fine Tuned Models
We can compare 2 or more fine-tuned models directly by looking at the weightwatcher layer quyality metrics. As an example, lets compare the Falcon-7b-instruct model to the Falcon-7b-sft-mix-2000 model.
4.a) Comparing the layer averaged alpha <alpha>
we can compute the layer average alpha for the 2 models directly from the details dataframe ( <alpha>=avg_alpha) using:
avg_alpha = details.alpha.mean()
Doing this for both models, we find:
- falcon-7b-instruct. <alpha> =~ 2.8
- falcon-7b-sft-mix-2000: <alpha> =~ 2.6 (smaller is better)
From this, we see that the falcon-7b-sft-mix-2000, having a smaller average alpha, is a little bit better than the falcon-7b-instruct. Can we say more ?
4.b) Comparing layer alpha histogram plots

Comparing ths at this plot to the one above, we see that the falcon-7b-sft-mix-2000 has a few undeseirable layers with alpha < 2 *(left of the red line), but, more importantly, has a maximum alpha of ~3.5. In contrast, while the falcon-7b-instruct models has fewer layers left of the red line, it’s maximum alpha is ~ 4.5…much higher. So, on average (and even if we ginored the layer alphas < 2), we find that the alcon-7b-sft-mix-2000 is a little better.
5.) Summary
We have seen how to use the weightwatcher tool to evaluate and compare 2 different fine-tuned models (with the same base model, falcon-7b). Notice we did not need to run inference or even need any test data.
To run these calculations quickly, I used an A100 GPU on Google Colab, and they only took a few minutes. In fact, it took longer to upload these large model files to my Google Drive than to run weightwatcher.
But these are just 7B parameter models, and since these LLMs can get fairly large, in the next blog post, I will show how to analyze the much smaller adapter_modell.bin model files (and trained with or without PEFT/LoRa(, directly with weightwatcher.
Stay tuned. And if you need help training or fine-tuning your own LLMs, please reach out. #talktochuck #theaiguy

Hey Charles, how are you? Shall we make another episode on Data Science at Home, this time speaking about tuning LLM and controlling them (among other things)?
Cheers, Francesco
LikeLike
Lets do it!
LikeLike